Showing posts with label Yummy Recipes. Show all posts

Wednesday, March 22, 2017

Tomato seafood pasta with rocket


Our family eats pasta pretty often. That's because somehow, anything with a tomato-based sauce for children always goes. Like always. I can really just cook plain pasta with tomato sauce and cheese and they would think I'm the best Mom in the world. Super.NOT.kidding!

Since coming back to Germany, I feel like I've lost my cooking mojo. It's a lot of work to plan daily meals and ensure the toddlers have a nutritious diet to support their growth spurts, food is baby-friendly enough for a 11-month old baby and the whole cooking process does not take longer than 20 to 30 minutes.

And have I mentioned how evening time at the Tews household can look like a madhouse? The hub tries to come home at 7pm, but when he's late - by late I mean anytime between 5 to 15 mins late, I feel like I'm holding a time bomb that is waiting to explode.

Picture this. Baby crying because he's hungry. Kids are dirty from their kids' gym (every Tuesday) so they need to go take a shower, but of course they want either me or the Dad to shower them. I'm hungry and tired too, but I still have to prepare a meal to feed a family of 5. I'm barely holding it all together and when the hub rings the doorbell, it's like I really. REALLY. heave a huge sigh of relief!

Sometimes this sigh of relief translates to a "why are you so late?" grumble. You get the idea. The poor hubby. This is real life though. I'm not mincing words. I enjoy being a Mom a LOT but there are times when I so do wish I have an extra pair of hands to help me out.

This is why recipes like this one has saved me countless times from hungry kids. I posted this photo on my Instagram and Facebook and since quite a few of you asked me for the recipe, I figured I'm going to blog about it rather than give you sloppy instructions.

Ingredients:-

- 3 to 4 cloves Garlic (chopped)
- 1 large Onion (sliced)
- 250 grams fresh Brown mushrooms (sliced)
- 200 grams mini Cherry Tomatoes (washed and cut into half)
- 3 to 4 large Tomatoes (chopped)
- 750 grams Tilapia fillet
- 250 gram Shrimps
- 300 grams Pasta
- Handful of Scallops
- 500 grams Tomato sauce
- Rocket (washed and cut for garnish)


1. Prepare the ingredients. Chop the garlic, slice the onion and brown mushrooms.

2. Cut the cherry tomatoes into half and chop up the large tomatoes

2. Cut up the tilapia fillet. You want to cut it into big chunks because fish breaks up quickly in the heat and you want your fish to be intact

3. Start cooking your pasta according to how much time it takes to cook

4. Heat up some olive oil in the pan. Pan-fry the garlic until fragrant (about 1 min) before adding in the large onion. Make sure your heat is medium because you don't want to burn the garlic

5. Add in the fresh brown mushrooms, fry until it starts to wilt.

6. Add in the tilapia, shrimps and scallops altogether. Fry for a few minutes.

7. Add in chopped tomatoes with the packet of tomato sauce.

8. Season generously with Italian herbs, Krauter De Provence, salt and pepper

9. Cover for a couple of minutes to let the sauce simmer

10. Serve with pasta and garnish with rocket salad. I like my pasta with some chilli flakes, which I obviously leave it out for the kids.

Let me know how your pasta goes! I'm excited to see how it works out for you! Of course you're welcome to use other ingredients too! I'm not a fan of mussels so I never use that, but the Italians use mussels in their pasta dishes ever so often!

Tuesday, December 02, 2014

Katsudon (Meat cutlets with egg and onions)


Oops I did it again!

Feel so proud of myself!

Don't mind my egocentrism. This is my blog afterall. Let me engage in some *pat pat* because it's not everyday that I have the time nor energy to experiment in the kitchen.

But a couple of weeks ago, I finally got down to trying this recipe!!!

And it was a huge success!!!! Tasted EXACTLY like in the restaurant! And it wasn't as hard as I had feared to cook!!! Ok, it was a bit tedious and our kitchen looked like a bomb exploded after that but it was sooo worth it!

My boys loved it and I even ate two portions! - Over two days of course!

This is a very typical Japanese homecooked meal and one can find it in most Japanese restaurants. It's similar to German schnitzels but instead of using regular breadcrumbs, most recipes call for "Panko" - Japanese breadcrumbs. The crumbs are larger and more crispy when one deep-fries it. I have not tried baking the cutlets in the oven although I have heard that this method works well too. 

The main tedious thing about this dish is the deep-frying of the cutlets as well as the fact that you'd have to assemble each portion individually. Other than that, it's quite manageable.

I wouldn't attempt to do it on weekdays though, due to the fact that I usually cook dinner with 2 kids running around me. But it's definitely a great meal for the weekend.

Do try it and let me know how you find it!

Ingredients (A) (about 6 servings):-

- 1 kg Turkey fillet  / Chicken fillet / Pork loins  (Schweinhals) (sliced thinly)
- Some onions (sliced thinly)
- 2 Eggs  (beaten for cutlet)
- 1 Egg (beaten for sauce)
- Panko crumbs
- Seaweed for garnishing

Sauce for 2 portions (B):

- 3 tsp Mirin
- 4 tsp Soya Sauce 
- 1 tsp Sake (optional)
- 3 tsp Sugar
- 1 tsp Dashi (soup stock powder)

1. Prepare the cutlets but slicing them thinly and seasoning with salt and pepper on both sides.

2. Coat them in flour, followed by some egg and some panko. Set aside.

2. Heat up some oil over high heat. Test the oil by dropping one piece of panko into the oil. It sound sizzle and float to the surface quickly.

3. Turn down the heat to medium-high and place the cutlets in the oil for about 2-3 minutes on each side until cooked thoroughly and golden brown.

4. Remove the cutlets and slice the cutlets such that the pieces are still connected a bit on one side. This is to ensure that the cutlets are more manageable for the next step.

5. Prepare the sauce by mixing all the ingredients (B) together in a bowl.

6. Boil 350 grams of water in a pot. Once water is boiling, add ingredients (B) and stir in onion.

7. Cover for about 2 minutes while the mixture boils.

8. Add cutlet into the mixture. 

9. Drizzle beaten egg over mixture and cover for 30seconds to 1 minute depending on how well you want your eggs done.

10. Serve some steamed rice in a bowl topped with the cutlets and garnished with some chopped seaweed.

Cook's notes: 

- If this is the first time you're doing this, I would advise you to take a look at a video first. This would give you a gauge of what to expect. Katsudon recipe on video

- My children preferred the chicken meat because it's more tender and easier to chew compared to pork. Turkey works well too. 

- Remember to cook your rice in advance because this dish requires the rice to be done by the time the cutlet is done. You wouldn't want your cutlet to be sitting too long in the sauce either because you want your meat crispy but not soggy.


Enjoy!

Wednesday, October 29, 2014

Okonomiyaki (Japanese Pancake)

I've been venturing into Japanese food lately.

It's no secret that hubby and I love all things Japanese. We would eat sushi every week if it only weren't so expensive here!

I have a Japanese friend in Stuttgart from whom I picked up some tips for Japanese cooking, but she's more of a cooking-by-feeling person. Without any recipes, I've been too lazy to research for recipes to experiment.

Until now that is! 

I've been getting bored with my daily cooking, so I knew that I needed a breath of fresh air in my kitchen.

Hence, when I saw that the Asian store where I usually go to started to stock up on Japanese condiments, I knew that this was my sign to venture into unknown territory!

I've  been wanting to try out Okonomiyaki for the longest time. It's simply savoury Japanese pancake that one can top with anything one wants.

The basic ingredients for the toppings would be cabbage and pork slices.

The best part about this meal is that you can put a hot plate on the table and do the cooking while talking to your guests. You can make one pancake after the next, without actually leaving your table. That would ensure that your pancakes are always eaten warm and quickly.

I did some research online and came up with my own version of Okonomiyaki. As a disclaimer, I ain't Japanese and neither am I a connoisseur of Japanese food, so feel free to modify the recipe according to your taste!

I still need to work on the aesthetics of my pancake and my pancake flipping skills but other than that, hubby and I loved it so much that we did the same dish again one week later! My boys are still (unfortunately) not too impressed with it, probably because they are not used to the taste of Japanese food... yet.

Having said that, Sammy loves salmon nigiri, but he doesn't like the taste of seaweed whereas Gabriel seems to enjoy salmon maki, together with the seaweed! I'm sure that it is only a question of time before my boys become mini converts too!


(Serving size: About 4 huge pancakes. Enough for a family of 4 with 2 guests)

Ingredients for the pancake mix: -

- 250 grams flour
- 2 eggs
- 300 grams Water
- 2 tsp Dashi powder

Toppings:-

- 1/2 a large Cabbage (chopped)  (I used Spitzkohl) 
- 500 grams Pork Fillet (thinly-sliced)
- 12 Shrimps (cut into small pieces)

- A bunch of Spring Onions (chopped)
- Katsuobushi (Fish flakes)
- Anori (Seaweed either sliced or in powdered form)
- Okonomiyaki Sauce
- Japanese Mayonaise (I used normal Mayo)

1. Make the pancake mix in a large bowl.

2. Add cabbage and shrimps to the pancake mix. Combine well. The final mixture should be viscous but still flow easily. This is to ensure that the pancake sticks

3. Heat some oil in a pan over medium heat. Pour the pancake mixture from step 2.

3. Place some slices of pork fillet on top of the pancake mix. Cover and cook until the pancake layer is done.

4. Flip the pancake carefully. I used a huge flat spoon. Let it cook uncovered for another 5 minutes or until done.

5. Serve on plate with toppings facing upwards. Spread Okonomiyaki sauce and Mayonaise generously on top. Sprinkle some Katsuobushi and Anori.

Enjoy!

Adapted from recipe here

Monday, September 08, 2014

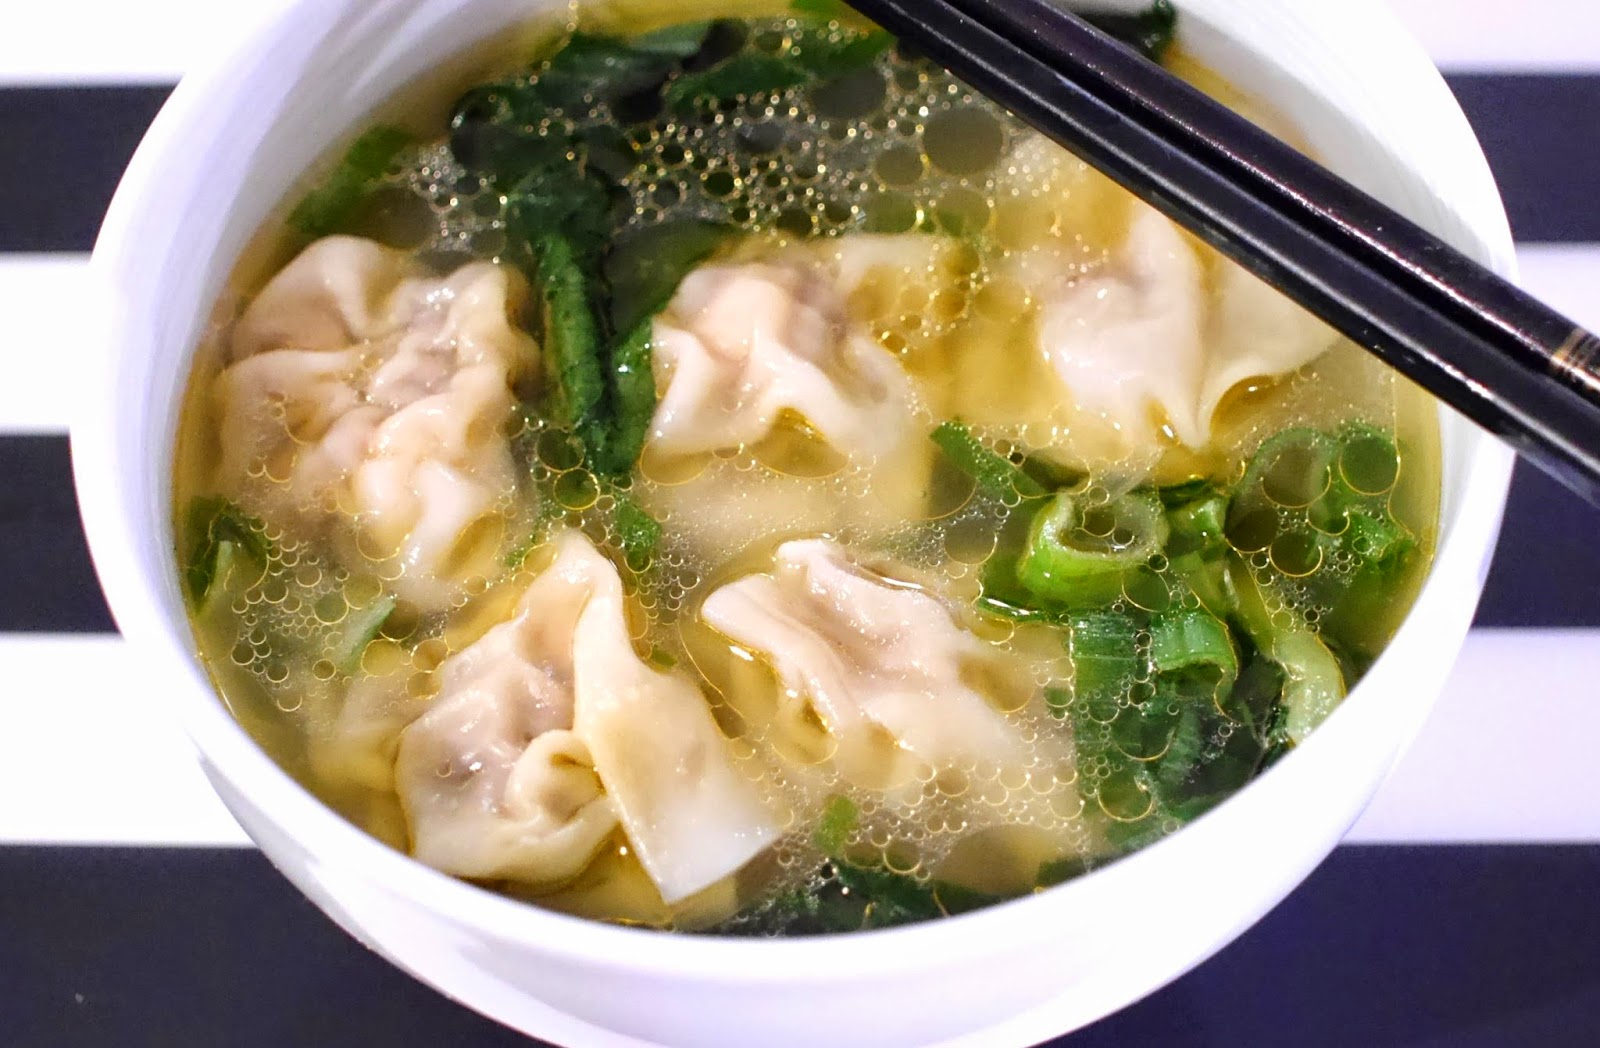
Wan ton soup - revisited


I made Wan Ton soup today. It was a spur of the moment thing since I was already out and about and I didn't have the kids with me. It's hubby last day of leave and I used this opportunity to get myself a pedicure while I still can. Finally the first time I have nice toes and summer is almost over!

I managed to make a run to the Asian store and decided to try and make Wan Ton soup. I must admit that I haven't been very successful in making these dumplings because I always found the dumplings tasted bland. And I could never get my soup to taste authentic.

As a result, hubby never developed a liking for this soup dish and he preferred to have his dumplings fried - doh!

This time though, it was a HUGE success! I decided to make my own chicken soup from scratch and use the chicken broth to cook the dumplings and Chinese vegetables.

Hubby is finally a convert for Wan Ton soup! In fact he liked it so much, he said I can cook this anytime and he doesn't need anything else except the Wan Ton soup and Char Siew barbecued pork. 

I found that the noodles need improvement though! I think I'm going to ask my cousin in Singapore, whose father is an owner of a Wan Ton noodle store in People's Park what their secret recipe is! 


My recipe for chicken stock:-

- 1 whole Chicken
- 1 Onion, quartered
- 1 Tomato, quartered
- Handful of dried Scallops

1. Boil some water in a pot big enough to fit the chicken. Do NOT add too much water. You would rather have less stock and a stronger taste.

2. Once boiling, lower the heat to medium and lower the chicken into the water.

3. Add onion, tomato and dried scallops. Leave the stock to simmer over low to medium heat for about an hour. The longer the better.

4. Remove the chicken from the stock, sieve the stock and its ready to use.

Note: I chose to make my own chicken soup because I wasn't happy with the mushroom soup stock from the original recipe. 

Wan Ton recipe:- 

To make the dumplings, I followed the recipe from RasaMalaysia here. They tasted SUPERB! 

Gravy for noodles:- 

As I mentioned, I'm not satisfied with the taste of the gravy for the noodles. So I can't really recommend using the same recipe for the noodles. If you have any good recipes, please share!

Saturday, September 06, 2014

Easy Mediterranean rice


This is my latest invention.

It was one of those days when I felt mega uninspired about what to cook and I didn't have enough food in my fridge.

I would so have loved to go to Burger King / Macdonalds and get the whole lunch thing over and done with. BUT being a Mum to two young boys, I simply couldn't feed them junk food and hope that they would not be hungry. Sammy has a love-hate relationship with his cheeseburger and while Gabriel likes french fries, I find it hard to justify french fries as a proper meal.

So whether I liked to or not, I had to cook.

Don't you hate those moments?

Well, so I did the next best thing I could do. I ransacked my fridge and freezer for whatever remnants of food I could find.

I found frozen prawns, frozen green beans, mozarella cheese and a couple of fresh tomatoes.

Usually I would cook pasta with tomatoes, but how could I possibly put green beans into my pasta? I'm sure my boys wouldn't have minded, but my hubby would have slaughtered me. Hah.

I decided to cook some rice and see where my creative juices took me. And oh boy! Was I even impressed with my own cooking! It was so easy to cook this meal - just one pan and I fried everything together. And because I didn't follow any recipe (I only seasoned it with salt and pepper), that really brought out the natural flavors of the shrimps, tomatoes and beans! The boys ate everything up such that we hardly had any leftovers.

It's one of those meals that you feel you can give yourself a pat on the back. Enough greens in a one-pot dish and yet tasty enough for your hubby to eat. Yeah, my hubby is the barometer of taste in the family because if he could have it his way, he wouldn't necessarily need any vegetables in his meals.

I'm no professional mediterranean chef, but this tasted mediterranean enough for me. It's like Italian fried rice. 

Ingredients:-

- 2 cups rice
- 2 tbsp Olive oil
- 3 Tomatoes, diced
- Handful of beans
- 250 grams Shrimps
- 1 packet Mozarella cheese, diced
- Handful of Basil leaves, chopped
- 4 cloves Garlic, chopped
- 1 large Onion, chopped

1. Cook the rice. While the rice is cooking, prepare the rest of the ingredients

2. Fry garlic and onion in olive oil until fragrant.

3. Add in the tomatoes and fry until the water almost evaporates.

4. Add in the chopped beans followed by the shrimps.

5. When the shrimps are almost done, add in the rice and mix well.

6. Season it with salt and pepper.

7. Before serving, garnish it with basil leaves and mozzarella cheese. The heat from the rice would melt the mozzarella cheese.

8. Serve warm.

Chef's notes:

- You can add whatever leftover vegetables you have in your fridge. But fresh tomatoes are of essence here, because you want the tomato juice to coat the rice.

- If you have more time, it would be better to cook the rice in advance and allow the rice to cool down before frying it. That way the rice grains remain intact while frying.

- We didn't have time for the previous step, so I fried the rice over very high heat. That way I limited the cooking time and the rice still remained intact.

- The final product tasted a lot like mediterranean baked rice without the additional baking time. Win!

(Disclaimer: We do go to fast food sometimes when we're in a time crunch. Everything in moderation yo.)

Sunday, August 24, 2014

Fried Carrot (radish) Cake - Singapore

My perennial all-time favourite breakfast food

I know my blog posts have been sparse. Do bear with me. I'm trying to blog more now that we're into our 6th week of being in our new abode.

Cooking with our new induction stove has been ...hmm.... a learning curve. Who would have thought right?

The induction stove heats up so quickly that garlic gets burnt really fast! I've had to discard garlic which I had painstakingly chopped because it charred in seconds after being thrown into the pan. I'm even unable to allow sauce to simmer without keeping an eye on it because the bottom of the pan burns so quickly!

For this reason, while I'm experimenting with the different levels of heat on my stove, I'm usually unwilling to cook fancy meals. The good thing is that there is a timer function for each individual hob so I no longer have to rely on a manual timer.

Still, after 5 weeks of eating quick meals I was starting to crave for real Singaporean meals. Facebook ain't the best place for a Singaporean living overseas, with the avalanche of food shots inundating my news feed. I have even blocked certain pages simply because I couldn't tolerate the whole seeing-but-not-eating feeling.

We finally made it down to the asian store recently and I stocked up on my necessities. One of the things I'd buy is rice flour because that's exactly what I need for my all-time favourite - Chai Tao Kway, or rather fried carrot cake done the Singaporean way.

I'm proud to say that Sammy loves it and he keeps telling me "Nice. Sammy likes it!" Gabriel is still not entirely convinced at its taste, but he's currently in a phase when he's simply not eating well and drooling a lot. His nights have been very tough too cos he would scream for no reason. We're hoping that it's just a phase of teething and that things would soothe itself out.

It was sooo good satisfying my craving. I had this with some sambal chilli.

If you're interested, this is my photo documentary of how I made the cake. The original recipe is here and I've adapted it for myself here.

Ingredients:

- 1 radish, grated (about 500 grams)
- 250 grams water
- 200 grams rice flour
- 1/4 tsp salt

1.  Puree the radish with a bit of water in a puree machine / babycook. Drain.

2. Mix the above ingredients and steam it over high heat for about 40 mins or until you get a smooth cake.

3. Allow the cake to cool before cutting it into small pieces to fry.


Ingredients:

- 5 cloves Garlic (chopped) 
- 2 tbsp Chai Por (preserved radish. Soak in water for 5 mins and drain)
- 3 Eggs, beaten
- Fish sauce to taste
- Tai Hwa sweet black sauce (I import mine directly from Singapore)
- Spring Onions (chopped)

3. Heat up some oil in a wok. Fry the carrot cake until crisp and a bit browned.

4. Add Chai por and chopped garlic. Add more oil if it gets too dry.

5. Add fish sauce to season.

6. Pour beaten egg over fried carrot cake. Allow egg to cook for a bit before flipping it over.

7. Add spring onions and fry. (I like my spring onions cooked)

8. Add sweet black sauce and coat. I add mine generously because I like my carrot cake sweet. You can omit this step if you prefer the white version.

Monday, April 21, 2014

Lemon Pound Cake

My maiden attempt at lemon cake!


I've always wanted a recipe for a lemon cake. It's just one of the standard cakes you get at almost every German potluck. 

Hence, when my friend brought her home-baked lemon pound cake for playgroup the other day, I simply had to try her recipe, especially cos it tasted SOO good and it was from Martha Steward!

This recipe is superb! The cake is so light, fluffy and moist. I've not tried any other lemon cake recipes, so I can't tell if this is the best recipe, but it's definitely very good!

The preparation is not the fastest though, cos you'd have to mix the dough by adding one egg at a time. But other than that, we were so satisfied with the recipe that we ended up baking it twice in a span of 4 days! 

The original recipe stated that recipe is enough for 2 cakes, but we found that it was more suitable for 1.5 cakes. We like our cakes big you see. 

A word of caution though. The baking time varies. The first time I baked the cake, it ended up perfect. However, the second time I baked it, the bottom part got burnt - which could be because we over-heated the oven to begin with or perhaps we accidentally placed the cake directly on the bottom of the oven instead of putting it on the last rack. 

In any case, the next time we bake it, we would simply put the cake in the middle of the oven and watch the cake after about 40 minutes to ensure that the top does not get burn. 

The original recipe states all the ingredients in the U.S. cup system, so I've taken the liberty to convert everything to the metric system. 

Ingredients:-

Small bowl 
- 190 grams Buttermilk
- Fresh lemon juice (from about 2 lemons)
- Lemon zest (from 3 lemons), finely-grated

Medium bowl
- 420 grams Flour
- 1.5 tsp Salt
- 0.5 tsp Baking powder
- 0.5 tsp Baking soda

Large bowl
- 225 grams unsalted Butter, softened
- 400 grams Sugar
- 5 large Eggs

Lemon glaze
- 250 grams Icing sugar
- Fresh lemon juice (4 tbsp) 

1. Preheat oven to 180 degrees celsius, with rack in the middle. Line baking tin. 

2. In a small bowl, combine buttermilk, fresh lemon juice and lemon zest. 

3. In a medium bowl, whisk together flour, salt, baking powder and baking soda.

4. In a large bowl, cream butter and sugar until light and fluffy with an electric mixer.

5.  Add eggs one at a time, beating well after each addition. 

6. With mixer on low, add flour mixture in three parts, alternately with the buttermilk mixture in two, beginning and ending with flour. Beat until just smooth (do not overmix). 

7. Place batter in baking tin and bake for 50 minutes or until done (check by inserting a toothpick in the center and see if it comes out clean). If cake is browning too quickly, cover with aluminium foil. Cool cake completely before glazing. 

8. Prepare lemon glaze by mixing icing sugar and lemon juice in a bowl. Adjust the consistency by either adding more lemon juice or more sugar. Glaze should be thick, yet pourable. 

8. Glaze cake with lemon glaze. Let it dry (about 30 minutes) before eating.

Adapted from original recipe here.

Saturday, February 15, 2014

Italian noodle salad


My favourite (and only) noodle salad


It's been wayyy too long since I last blogged about a new recipe.

I do still read up on new recipes and print them out in the hope of trying them. However, when it comes to crunch time, I'm always dishing out tried-and-tested recipes that I can recall without having to refer to my recipes.

Being a Mom of two, my cooking time is very (ie.extremely) limited so I'm never adventurous enough to try out anything that takes me longer than 30 minutes in the kitchen.

I've been wanting to blog about this new recipe for the longest time, but have never been able to snap a photo of it before it was gone - that's how good it is!

Noodle salad is a staple in the German household. It makes it appearance at almost every party that I've been to but I have always given it a miss simply because I don't like the distinctive taste of pickles in it. Oh and have I mentioned that the first time I tried noodle salad, I was appalled that the pasta wasn't warm! I mean, who in the right mind eats cold pasta? It's like eating cold rice! Ok, the Japanese eat cold rice with sushi but regular Chinese meals with cold rice??? Bleah!

I first tried this Italian noodle salad at a friend's birthday party and instantly fell in love with it. It has everything I love about Italian food - rocket (rucola), cherry tomatoes, balsamic vinegar and garlic. What's there not to like? Oh and no pickles!

This Italian noodle recipe has singlehandedly made me into a noodle salad convert! It has been tried in our household three times and has always been a hit with guests. It was originally from this popular German website, but I have modified it to suit my taste and most importantly, translated it to English of course!

Also, because its pretty much a cold dish, you can prepare it in advance and eat it later at your convenience. I personally eat it immediately after I prepare it, so it tastes fresh even if the pasta is cold. When I eat it one day later, I like to scoop out a portion of the salad, heat it up in the microwave and allow the mozarella to melt over the pasta. That way it tastes great on the second day too.

It makes great party food too. Be wary though. Once you make it, you can be sure that your friends are going to ask you to bring it again for the next party.

Unfortunately, this salad might not be suitable for young kids since it uses raw garlic. I'm speaking from experience because try as I might, Sammy refuses to eat a bite of it despite our attempts to feed him. I think he finds the balsamic vinegar too sour for his taste buds? 

Ingredients:-

- 300 gram Pasta (eg. fusilli) 
- 250 gram Cherry Tomatoes (quartered)
- 250 gram Bacon bits (Katenschinken)
- 100 gram Pine nuts
- 300 gram Mozarella balls
- 100 gram Rocket (rucola)
- Parmesan cheese  (in a block)

 For the salad sauce:-

- 70 ml Olive oil
- 3 tbsp Balsamic vinegar
- 1 tsp Pesto (I used balsamic pesto)
- 1 tsp Mustard
- 1 tsp Honey 
- 1 clove Garlic (chopped)

1.  Cook the pasta al-dente according to the packet instructions. Drain and set aside.

2. While the pasta is cooking, dry roast the pine nuts over medium heat paying attention that it does not burn. Set aside.

3. Fry the bacon bits without oil. It will fry in its own fat. Set aside.

4. Place the pasta, pine nuts, bacon bits, mozarella balls, cherry tomatoes and rocket in a big salad bowl.

5. Prepare the salad sauce and pour it over the rest of the ingredients.

6. Mix well and season with salt and pepper. I omit the salt usually because bacon is salty enough.

7. Before serving, shred some parmesan cheese over the salad. Enjoy!

Before mixing


Tuesday, August 13, 2013

Salmon pesto pizza


Now that my hands (and feet) are tied with two little ones, I know the importance of being able to churn out dinner with no time at all.

I used to think that I was efficient with handling my household chores with one kid - until I got another one that is!

The body does adapt quickly though. Now that I'm into my 4th week of being alone with the two kids and Gabriel has turned 6 weeks old, I find myself slowly finding my rhythm in the daily grind of endless diaper changings and breastfeeding. 

One of the challenges that remain is trying to figure out what food I can possible cook without having to stand at the stove or spend ages preparing.

This was when the idea of preparing salmon pesto pizza popped into my head.

I usually cook salmon in pasta, either with a cream-based or a tomato-based sauce. If I do it Asian, I make ourselves some Japanese teriyaki salmon with grilled vegetables.

Hence, salmon on pizza was a first for me.

Verdict? It was awesome! Took maybe 10 mins to prepare and that's it!

Sammy loved it and so did I. Hub is still more of a salami-and-ham pizza kinna guy, but this is still going straight into one of my must-have recipes.

Ingredients: -

- 400 grams Salmon (sliced)
- 200 grams fresh Mushrooms (sliced)
- 1 can Pesto Rosso (Barilla brand)
- 1 sheet of ready-made Pizza dough 
- Italian herbs
- Salt and pepper
- Mozzarella Cheese / Pizza cheese
- Fresh Basil leaves

1. Prepare ingredients by slicing salmon and mushrooms

2. Spread pesto rosso on a sheet of ready-made pizza dough

3. Arrange a layer of fresh mushrooms followed by salmon.

4. Season with Italian herbs, salt and pepper.

5. Top off generously with pizza cheese. Bake at 200 degrees celsius for about 20 minutes (follow the instructions on the pizza dough packet).

6. Garnish with fresh basil leaves before serving. Enjoy!

The Pesto Rosso I used

Sunday, June 23, 2013

Smoked salmon pasta


I can't believe that I haven't posted this recipe!

It's one of my family's favourite recipes and I could whip it up in about 15 minutes flat. The only fresh ingredient needed for this dish is the smoked salmon, which can easily be kept in the fridge for a couple of days.

Other than that, the other ingredients can be kept for a long time.

Usually the taste of salmon is not strong enough to give taste to pasta, but smoked salmon itself tastes soooo good that I don't even need to add any salt.

Try it and you'll realize what I'm talking about! 

Ingredients:-

- 400 grams smoked Salmon
- 220 grams Spaghetti / Linguini
- 5 cloves Garlic, chopped
- 1 / 2 tablespoons Olive Oil
- 400 grams of cream (I used lactose-free cream)
- 1 teaspoon capers (optional)
- Handful of grated cheese
- Dash of freshly-crushed black pepper
- Handful of chopped parsley for garnish

1. Cook pasta according to packet instructions.

2. While pasta is cooking, heat up olive oil in a wok / pan.

3. Stir-fry garlic for a few minutes ensuring that it does not burn.

4. Add the pasta and stir-fry pasta in garlic until aromatic.

5. Add in the smoked salmon and fry until it breaks up into small pieces.

6. Add the cream and mix well. 

7. Add the capers, grated cheese and black pepper for taste. Mix well.

8. Before serving, garnish with a handful of chopped parsley.

Enjoy!

Monday, June 03, 2013

Beef Hor Fun


Yeah, I know that I've been on a roll lately. A foodie roll that is.

Don't ask me why. It's just that I've been coming across so many lovely recipes online (thru Facebook) that I can't wait to try them out before baby #2 makes an appearance.

My latest accomplishment has got to be my favourite one thus far!

Beef hor fun is a staple at many Singaporean hawker centres. It's comfort food and hubby loves it. One can either cook it dry or wet (my version). The dry version is a bit difficult to replicate at home because the flat rice noodles break easily and when one does not have a fire stove, it's like a suicide mission.

The wet version on the other hand, is pretty simple to cook and I must say that I enjoy having my noodles with sauce. Sammy loved this dish so much, he slurped up spoon after spoon of noodles and gravy.

Oh, another advantage about cooking this dish by yourself? You get to add as much ingredients as you want, compared to measly portions one usually gets when one eats out. For us though, we don't have the luxury to get this at restaurants here, so home-cooked food is the way to go!

One can use beef fillet, but I opted for the slightly-cheaper rumpsteak portion which tasted just as amazing. It has a higher fat content but taste-wise I felt that rumpsteak suited this dish just as well. I didn't use any beef tenderizers either since a good steak cut does not need to be tenderized.

Ingredients:-

- 300 g of flat rice noodles (get the wide 10mm types)
- 300 grams of beef fillet / rumpsteak (thinly-sliced)
- 5 cm ginger (thinly sliced)
- 2 garlic cloves (chopped)
- 3 spring onions (cut into 6 cm lengths)
- 400 ml of meat stock

Seasoning for gravy:

- 1 tbsp light soy
- 1/2 tbsp dark soy
- 1 tbsp oyster sauce
- dash of sesame oil
- pepper to taste
- corn starch solution (2-3 tbsp corn starch mixed with a bit of cold water)
- 2 egg whites

1.  Marinate the beef slices with a little soy, sesame oil, pepper and corn flour.

2. Mix 1/2 tbsp of dark soy with rice noodles.

3. Fry rice noodles in a smoking hot wok with a little oil. Do not move the noodles too much to prevent breakage. Set aside.

3.  Fry marinated beef with a little oil until about 50% cooked. Remove from wok and set aside.

4. Saute garlic and ginger for 15 seconds then add in spring onions and continue to cook for a further 30 seconds. Add stock and seasonings and bring it to a boil.

5. Drizzle in the egg whites and give it a light stir.

6. Gradually add in the corn starch solution to thicken the sauce until desired consistency. Finally stir in the beef and allow it to cook completely without overdoing it.

7. Pour gravy over the noodles and serve immediately with green pickled chilli.

Cook's notes:

- You can save time by peeling the ginger using a spoon instead of a knife.

- I used Lacroix meat stock. Initially I was a bit concerned since this is a "western" meat stock after all. But after experimenting with this, I'd give it the green light for this dish! Super yummy and healthy (ie. no residual fat from boiling stock from meat bones).


Recipe adapted from here
Recipe for green pickled chilli

Sunday, May 26, 2013

Tau Suan

The weather has been so cold and gloomy these days. It's hard to come to terms with the fact that we're supposed to be having spring when it does feel more autumn / early winter. Brrrr.

Hence, when we went to the asian store to stock up on chinese ingredients and I saw some freshly-made you tiao - fried dough fritters, I immediately bought some and decided to make myself some Tao Suan.

Back in Singapore, there are a lot of sweet desserts made out of beans. Tao Suan is one of my favourite and it uses mung beans as a base.

This is the only the second time that I'm making this dessert because hubby ain't a fan of the taste of mung beans and the first time I attempted it, I made the you tiao from scratch, which was way too time-consuming and tedious for my taste.

Hubby and Sammy ate up the you tiao with gusto. Hub refused to try the mung beans while Sammy tasted at least 2 spoonfuls of it before stopping. I shall just have to persevere in training Sammy's taste buds to like my Singaporean sweet desserts!

I realized that I didn't post any recipe the first time round, so this is my fuss-free and easy recipe. I like this recipe because it does not use as much sugar as most other recipes ask for. Plus I modified it a little by using pandan essence because I didn't have any pandan leaves and it worked just as wonderfully. :)


Ingredients: -

- 150 grams Mung Beans
- Some You Tiao (toasted in the oven till crispy)
- 1/4 tsp pandan essence
- 50 grams rock sugar
- 500 ml water

Thickening glaze
- 40 grams starch / sweet potato flour / tapioca flour
- 125 ml water

1. Soak beans in water for an hour. Drain, steam for about 30 minutes.

2. In a pot, add water, rock sugar and pandan essence.

3. Bring to boil, reduce heat and add the mung beans.

4. Prepare the thickening glaze and stir it in slowly until mixture thickens to desired consistency. You do not need to add the entire amount.

5. Taste. Add more sugar if necessary.

6. Serve hot with you tiao. Enjoy! 

Monday, May 20, 2013

Stir-fry asparagus with chicken and shrimps


Asparagus is in season now. 

Before I came to Germany, I have never even tasted this vegetable before, let alone know how to cook it. However, the Chinese in me loves cooked vegetables and would have that anytime compared to raw salads. 

Don't get me wrong. I love my fresh salads too but it's one of those things that I eat once a week rather than everyday. Sammy ain't a fan of raw salads at this age, so I do try to incorporate more cooked vegetables in our daily meals. 

With this dish, he ate perhaps 50% of the asparagus that I stuffed into his mouth, while throwing out the other half. I think that's not too bad, considering the very strong unique taste of asparagus. 

Hubby, who ain't a fan of vegetables in general, loved this meal and said that it was a fantastic way to get him to eat his greens. 

I myself loved this meal. It was fairly quick to cook plus I loved the fact that I could throw all the ingredients in one wok and mix everything together.

Given that I hardly get to the Asian store these days for fresh produce, I do appreciate having another variety of vegetables to stir-fry. I must add that I'm becomingly increasingly wary of vegetables imported from China these days, due to the increasing food scandals and their notorious practice of drenching their crops in pesticides.  

Yup, so in short, this recipe is definitely a keeper!

Ingredients: -

- 600 grams chicken breast, diced
- 5 cloves of garlic, chopped
- 1 kg green asparagus (cut into smaller pieces, discard the bottom tip)
- 2 peppers (red / green / yellow), diced
- 250 grams shrimps
- 2 tbsp soya sauce
- 2 tsp tau cheo (preserved bean paste)
- sesame oil
- oyster sauce
- egg white from 2 eggs

1. Marinate the diced chicken in soya sauce, tau cheo and sesame oil for 15 minutes

2. Heat up oil in a wok. Stir-fry the diced chicken in oil until 3/4 done.

3. Add in the asparagus, peppers and shrimps. Stir-fry for a couple of minutes.

4. Add a bit of water and cover the wok. Simmer for a couple of minutes until the vegetables are softened but still al-dente.

5. Season with some oyster sauce and light soya sauce. 

6. Cook some egg whites in the sauce for that "hawker centre" feel. Thicken the sauce with corn starch if need be.

7. Serve warm with rice.

Notes: 

- I separated the sauce and ingredients when I stored them in the fridge overnight. This would help the vegetables to retain their crunchiness the next day.

- This recipe makes about 5 servings.

Saturday, May 18, 2013

Honey garlic pork chops


I think I've officialy started nesting. That's the phase when a pregnant lady starts to prepare her home for the upcoming new addition. 

Hubby and I have been spending some time on weekends trying to create more space in Sammy's room. This includes, but is not limited to, clearing out unwanted books / belongings by either discarding them or storing them into those huge Ikea transparent boxes.

We're also facing another flood of decision-making like whether or not we should get a double stroller or even get a bigger car for myself (since my current one is a two-door car with a very small truck space) etc. 

I've settled into such a nice routine with Sammy - with our playdates, social appointments, my housework and cooking. Sammy is also old enough for me to feed him whatever we eat and he doesn't grumble if dinner takes longer to be cooked.

However, I know that we would face another stage of adjustment with a second young one in the family, so in preparation for that, I have started to look out for easier recipes to cook at home.

After seeing this on my friend's blog, I made a mental note to try it out at some point in time. The original recipe is here, but I twiged it to metric measurements because I don't have the U.S. cup system at home.

This recipe is A.W.E.S.O.M.E! We simply marinated the meat the night before, left it in the fridge overnight and grilled it for lunch the next day.

A note of caution though. Our meat was charred quite a bit because we were quite "generous" with the grilling time. However, because the ingredients consist of honey, one should cut down the amount of time of grilling to avoid having too much charred parts.

Having said that, the pork chops still tasted amazing and we're definitely going to revisit this recipe soon!

Ingredients:-

- 8 pork chops
- 200 grams honey
- 4 tbsp soy sauce
- 8 cloves garlic, chopped (1 clove garlic / pork chop)

1. Whisk the honey, soy sauce and garlic together. Marinate the pork chops in this mixture overnight.

2. Grill chops over high heat, basting the chops with the remaining marinate mixture.

3. Serve with a side of mashed potatoes and vegetables. I opted for frozen mixed vegetables which I boiled for a while with the potatoes.

That's it! :) I'm confident that we would be able to handle this recipe with 2 little kiddos! 

Oh this recipe supposedly works well by baking the pork chops together with the marinade in an oven. I haven't tried this method yet, but this would be even more fuss-free! 

Sunday, March 17, 2013

Pork porridge


The whole family was sick last month.

The Chinese, as much as the Germans, believe in having light meals when one is sick. It's easier on the stomach and one has a higher chance of keeping the food down.

Of course our idea of what constitutes "light" food varies from culture to culture. In Germany, that would mean salt prezels, coke, plain bread, or plain biscuits. The Chinese version of "sick" or "light" food would be rice porridge, anything with soup, or mee sua - a type of thin noodles cooked in soup broth. I hated it when I was younger and my mom forced me to eat it. Even today, when I think of how it tastes, my stomach starts to churn. 

Bel and I were whatsapping the other day and exchanging porridge tips! If someone told me before I moved to Germany that I would be chatting with my girlfriend and exchanging porridge tips, I would have thought that this person was crazy!

But there we were, talking about porridge and what ingredients one could put in porridge to vary its taste.

We don't have the luxury of ordering porridge from eateries / restaurants here. Yup. There's not a single Chinese restaurant that sells porridge in Stuttgart. In any case, when one is sick, one is stuck at home and still has to somehow nurse oneself back to health.

I usually cook the standard chicken porridge from home-made chicken stock. Hence, pork porridge sounded like a very nice and tasty alternative!

Ingredients:-

- Brown rice (1 cup)
- Dried Scallops (About 12-15)
- Minced meat (200 grams)
- 1 Egg
- Soy sauce
- Oyster sauce
- Sesame oil

1. Soak the dried scallops in warm water until they are softened. I usually soak them for about an hour. Reserve the water.

2. Wash the brown rice and place it in a rice cooker with a porridge function. Pour in the water reserved from soaking the dried scallops and top it up with normal water.

3. Using your fingers, break the soaked dried scallops into smaller pieces and throw them into the rice.

4. Cook the porridge according to the rice cooker instructions.

5. While the porridge is cooking, marinate the minced meat with soy sauce, oyster sauce and a bit of sesame oil.

6. Once the porridge is done, pour it into a pot and turn on the stove.

7. Cook the minced meat in the porridge - You can either roll it up into meat balls, or simply stir the minced meat into the porridge (my preference because it's more fuss-free!)

8. Once minced meat is cooked, break an egg and either let it cook with the heat turned off (egg will be a bit runny), or cook the egg thoroughly before turning off the heat.

Sammy and I loved this porridge SO much! It was the first time I used dried scallops to cook porridge and oh boy, that made all the difference! I suppose one can use dried scallops for almost everything and it gives any dish the authentic Chinese / Cantonese flavour.

The idea of adding an egg is so innovative! Why didn't I think of that earlier? Thanks Bel! :)

Note:
Another alternative of making pork porridge is to make meat stock from pork ribs and use the stock to boil the porridge. I tried this once and it certainly tasted very good too. BUT pork rib stock does come with a whole lot of fat - which I reckon wouldn't be too easy on a weak tummy. Hence, this recipe is a healthier and faster alternative!

Monday, February 04, 2013

Winter melon soup


My food posts have been far and few between. I have been too caught up with my daily errands / toddler demands that I haven't managed to experiment much with new recipes.

I have however taken some photos of new concoctions in the kitchen and shall endeavour to slowly resuscitate the food part of my blog.

Soups are superb comfort food especially during winter. And the best part of it all? They require minimal effort. All one needs to do is to buy the necessary ingredients, dump everything in a pot and let it simmer for hours for that perfect homecooked stock taste..

I found winter melon in the Asian store the other day and decided to try it out since I needed some new soup ideas.

Am I glad I did! I randomly googled some recipes, made a mental note of the usual ingredients used and came up with a simple one for myself.

Even my German girlfriend told me that it was the best-tasting soup she has ever had. I wouldn't go as far as that to commend my soup but this recipe is definitely a keeper!

Ingredients:-
- 1 thick slice of winter melon (about 950grams, peeled and cut into wedges)
- Pork ribs (500 grams, cut into smaller pieces)
- A handful of red dates 
-1 honey date (optional)  
- Luncheon meat (I used half a can)

1. Put the winter melon, pork ribs, red dates and honey date in a pot. Cover it with enough water.

2. Let the water boil before lowering the heat to simmer for a few hours. The longer the better.

3. When soup is done, cut up luncheon meat and fry it (without oil). Season soup with salt if necessary.

4. Garnish the soup with luncheon meat and serve hot!

That was easy peasy right? This soup is very light and easy on the stomach. Hence, it also makes for great comfort food when one is not feeling well. Oh, hubby loves it too - much to my surprise. So you can try it on your non-Chinese friends / hubs. :)

Friday, November 30, 2012

Bacon and spinach pesto pasta


I've been wanting to post this new recipe for the longest time, but just couldn't find the time to do so.

This is such an easy recipe and one does not need any fresh ingredients so it's absolutely great for weekends and when one doesn't have time to head down to the supermarket.

I like to have my meals healthy, so I try to include greens whenever I can. Unfortunately, I'm not a huge fan of frozen vegetables so I try to get my salad / vegetables fresh.

That's why I simply adore this dish. Although I use frozen spinach, it tastes pretty awesome compared to the regular frozen mixed vegetables. Hubby and Sammy polish off their portions whenever I cook it and it's usually done in about 15 minutes flat.

For Mummies with kids, this recipe is awesome!

Ingredients:-

- 220 grams Pasta (3 portions)
- 5 Cloves Garlic (chopped)
- A handful of frozen Spinach
- 300 grams Bacon
- 200 grams fresh brown Mushrooms (optional)
- 200 grams Créme Fráische
- Grated Cheese

See Sammy's mini portion in the background?
1. Cook pasta according to packet instructions.

2. While pasta is cooking, chop up garlic finely.

3. Fry bacon in wok. No need to add oil because bacon will fry in its own fat.

4. Add garlic and mushrooms. Stir-fry for 2-3 minutes.

5. Add Créme Fráische and frozen spinach. Let the sauce simmer for a while

6. When sauce is almost done, add grated cheese.

7. Mix pasta together with sauce and serve hot.

Another variation to this recipe would be to get streaky bacon and fry it crispy. Remove bacon and use the bacon fat to fry the garlic.

Friday, October 05, 2012

Chocolate-coated bananas

I made these sweeties last week for Joni's (Sammy's Godfather) surprise welcome home party. He was away for 3 months on exchange in the U.S. and his devoted wife organised this party when he got back. Soooo good to have him back now! :)

I volunteered to bring dessert and felt very experimental that day. While cracking my brains about what to make, I recalled that German Christmas markets usually sell chocolate-coated fruits (eg. apples, bananas, strawberries etc.)

Thinking that it would be fuss-free to make, I decided to make my favourite chocolate-coated bananas. This would have been a fairly easy recipe BUT I actually managed to burn my chocolate! The long and short story of it was that I was distracted at the exact moment when the chocolate had to be removed from the heat!

My 80+ years old neighbour's caretaker was playing with Sammy while I was preparing the dessert. She walked through my door and asked me if I could help her to wear one of her earrings because Sammy pulled it out while she was carrying him.

Thinking it wouldn't take long, I offered my help but it turned out harder and longer than I thought. Before I knew it, the chocolate turned from a smooth liquid to some lumpy squash. There was absolutely no way I could rescue this thing, so I had to throw it away.

Of course by now we were stuck in the dilemma of "Should we buy some more chocolate while risk being late for the surprise party" or "Let's go empty handed". Hubby in his very cool voice suggested bringing the chilled bananas on sticks as dessert - to which I vehemently objected.

We compromised such that hubby would fetch baby and I to the party venue first while he went to buy more chocolate. Everything worked out in the end because hubby arrived before Joni did and my second attempt at chocolate melting was wayyy more successful than my virgin one. The bananas looked very attractive and were definitely a party pleaser.

One tip though: It would be wise to buy a mixture of regular and dark chocolate for the people who don't like their chocolate too sweet.
The frozen bananas when first taken out from the freezer
Chocolate before it was melted


Melted chocolate before it was burnt
Final product! Looks so colourful and cheery!
Another angle

Chocolate-coated bananas

- 6 bananas, peeled and cut into halves
- 200 grams chocolate (regular & dark)
- A handful of various toppings
- Some sticks

1. Skewer the halved bananas on sticks and freeze them for about 30 minutes.

2. Melt the chocolate over a double boiler. Use high heat at the beginning, but when the chocolate starts to become a liquid, lower the heat (very important!!) so that the chocolate does not burn accidentally.

3. Coat the bananas with the melted chocolate and decorate them with the toppings

4. Place the banana sticks in a cup either standing up or lying down on an open container.

5. Chill them for a while before serving 

Thursday, September 27, 2012

Stewed Mushroom with Chicken


This is another dish that we love! By "we" I mean Sammy and I. It's another recipe that came from my confinement food book but oh man, pregnant or not, this dish is delicious!

Its so easy peasy to make that I could have it everyday. Hubby has not tried this dish yet because I made it for myself for lunch. I didn't intend to feed Sammy this meal because I thought it tasted too "Chinesey" for his liking. I did offer him a spoonful to try though and oh boy, was I in for a surprise! 

Sammy usually stops me from feeding him with a shove of his hand once he is full. However, this was the first dish that he ate bite after bite with such enthusiasm that he finished the entire portion of food! Between the two of us, we polished off 5 chicken wings and a couple of mushrooms with rice!

I do wish that I had taken a more appetizing photo but in my rush to devour the food, I didn't bother to take a second shot as back-up.

My late maternal grandma was Cantonese and she used to cook a similar dish too - but without the chicken. The soft, chewy texture of Chinese mushrooms infused with the rich gingery flavour transported me back to my childhood days when the entire extended family (Grandma's 8 children and their respective children) would gather at her place for a multi-course Chinese dinner all cooked by my grandma of course.

Ingredients:

- Ginger (120grams, sliced)

- Garlic (5 cloves, chopped)

- Sesame oil (5 tbsp)

- Chicken breast (350grams, diced)

- Soaked Chinese mushrooms (100 grams)

- Water (500ml)

- Rock Sugar (10 grams)

- Light Soya Sauce (2 tbsp)

- Dark soya sauce (1 tsp)

- Pepper (1/2 tsp) & salt to taste

1. Fry ginger and garlic in sesame oil until fragrant.

2. Add in the chicken and soaked mushroom and stir-fry for a while.

3. Add in water, rock sugar, soya sauces, pepper and salt. Mix well.

4. Lower the flame and simmer for 10 minutes.
(I simmered it for wayyyy longer so that the mushrooms would be really soft and tender, while soaking up the taste of the sauce)

Tuesday, September 04, 2012

Fluffy pancakes


OOhh... I've been wanting to blog about this for the longest time.

Now that Sammy eats whatever I eat, I try to experiment food with him. While thinking about what to make for breakfast one day, I remembered that I haven't had pancakes for the longest time.

And not just any pancakes, but I had a craving for those airy, fluffy types. So I googled "awesome pancakes" and tried the recipe that came up. I read through the comments and modified the recipe to suit my needs.

The pancakes were delish and hubby was also in 7th heaven to be able to begin his workday with pancakes. Recipe is so quick and easy, I'm thinking of making these pancakes if we do brunch on weekends.

Oh and Sammy enjoyed them too of course. Although I think he's becoming a gourmet because he ate the pancakes when they were warm but when I stored them up in a tupperware for consumption later, he refused them flatly with a wave of his hand. **hmmm**
 
 While frying, air bubbles appear in the dough resulting in airy and fluffy pancakes
 The final product with honey since I didn't have maple syrup
 
 Pancakes (makes 8 medium pancakes)
  
- 360ml milk
- 4 tbsp white vinegar
- 250 grams flour
- 4 tbsp white sugar
- 2 tsp baking powder
- 1 tsp baking soda
- 1 tsp salt
- 2 eggs
- 4 tbsp butter (melted)
- Oil

1. Combine milk with vinegar and set aside for 5 minutes "to sour".

2. In a separate mixing bowl, combine flour, sugar, baking powder, baking soda and salt. 

3. After 5 minutes is up, whisk egg and butter into "soured" milk. 

4. Pour the flour mixture into the wet ingredients and whisk until lumps are gone. Leave aside and do NOT stir the mixture anymore. 

3.  Heat some oil in a frying pan. Over very low heat, pour batter onto pan and cook until bubbles appear on the surface. Flip and brown on the other side. 

Pris' notes: 

- The vinegar in milk is a substitute for buttermilk. So if you have buttermilk, just use it instead.

- As mentioned above, do not stir the batter once you're done whisking. You want your pancakes to be fluffy so you would want to avoid bursting the air bubbles trapped in the batter. 

- You don't want your pancake to burn, so use a very low flame / heat while cooking the batter. This allows you to control the cooking process better and will result in a delicious brown / yellow colour of pancakes. 

Original recipe: here

LinkWithin

Related Posts with Thumbnails